Learning to brew your own iced coffee is easy! It will save you time, money, and give you an amazing taste!Â
My friend Devin (see previous article here) wants to start brewing and potentially distributing Iced Coffee. When he mentioned needing someone to help experiment with different methods, I was all in. Â We began by researching how other fellow coffee enthusiasts made their iced Crema coffee – We learned a lot about what affects the strength and taste of iced coffee, such as; Temperature, Filter, Container, Type of Coffee, and Coarseness of the coffee. Mainly the best advice we found was to start simple. It’s easy to overly complicate coffee, specifically iced coffee brewing. With simple in mind we decided to try two different iced coffee brewing experiments.
Experiment 1: Found online at The Zen of Making
What you need: A 3 cup Mason Jar, a Paper Filter, Water, and Course Ground Coffee
Here’s how to brew it:

Simplicity at its best! Add the coffee directly into the water and let it sit in the fridge 12-24 hours!
Step 1: Measure 1/3 of a cup in Coffee – Ground Coarsely. If you have a grinder, set it to the most course setting; If not, you can have the person you buy coffee from grind it course for you.
Step 2: Have 2 1/2 cups of water in the mason jar. Now, add the 1/3 cup of coffee directly into the water– No filter needed yet.
Step 3: Put it in the fridge- Let it sit 12-24 hours. The longer it sits, the stronger it is going to be.
Step 4: Now is when you are going to filter it- And there are numerous ways you could do this. The easiest, with what you have, is to put a paper filter over a cup or another mason jar- Pour the brew from the mason jar slowly through the filter so that there are NO GROUNDS whatsoever in your coffee… Note: When you filter, putting a filter on a glass and holding it will work fine. There are more refined methods to filtering we’ll discuss in the next few parts of Iced Brewing.
Step 5: Add Ice — and enjoy that Iced Coffee you just brewed!
Time: First time – 10-15 minutes. It took us longer to make sure we were doing it right, setting it up. Second time, 2-3 minutes – Easy as pie!
Cost:Â Mason Jars are inexpensive and you may already have them. Same goes for paper filters; My recommendation is to buy a good bag of coffee, though – This will run you approximately $10ish- However, it lasts a while!
Quality Review: Good overall – Drank Black, but it was more of a medium brown color. A little light, coffee flavors are there. On the second trial, I let it sit the full 24 hours and it was much darker. The grounds settle in the bottom and don’t flow well in the jar. A similar taste to a Sun-brewed Iced Tea but with a coffee flavor.
Experiment 2: The Cheesecloth Method
What you need: A 3-Cup Mason Jar, A paper Filter, a Cheesecloth, Water, and a Course Ground Coffee.
This method is very similar to the first one, except we use a filter in the mason jar.

This is the cheesecloth “pocket” referenced above
Step 1: Measure out a 1/2 cup of coarsely ground coffee.
Step 2: Fold the Cheesecloth over the mason jar mouth so that the cheesecloth can provide a “pocket†to where the coffee can go, but yet where the edge of the cheesecloth can be screwed into the lid of the mason jar.
Step 3: Pour the ground coffee into the cheesecloth pocket (See pictures)
Step 4: Slowly drip water through the coffee, filling the mason jar entirely up to the brim. When you drip the coffee through, start on the edge and slowly work your way around the grounds. This forces the edge of the grounds into the filter, helping the coffee brew as it flows into the jar.
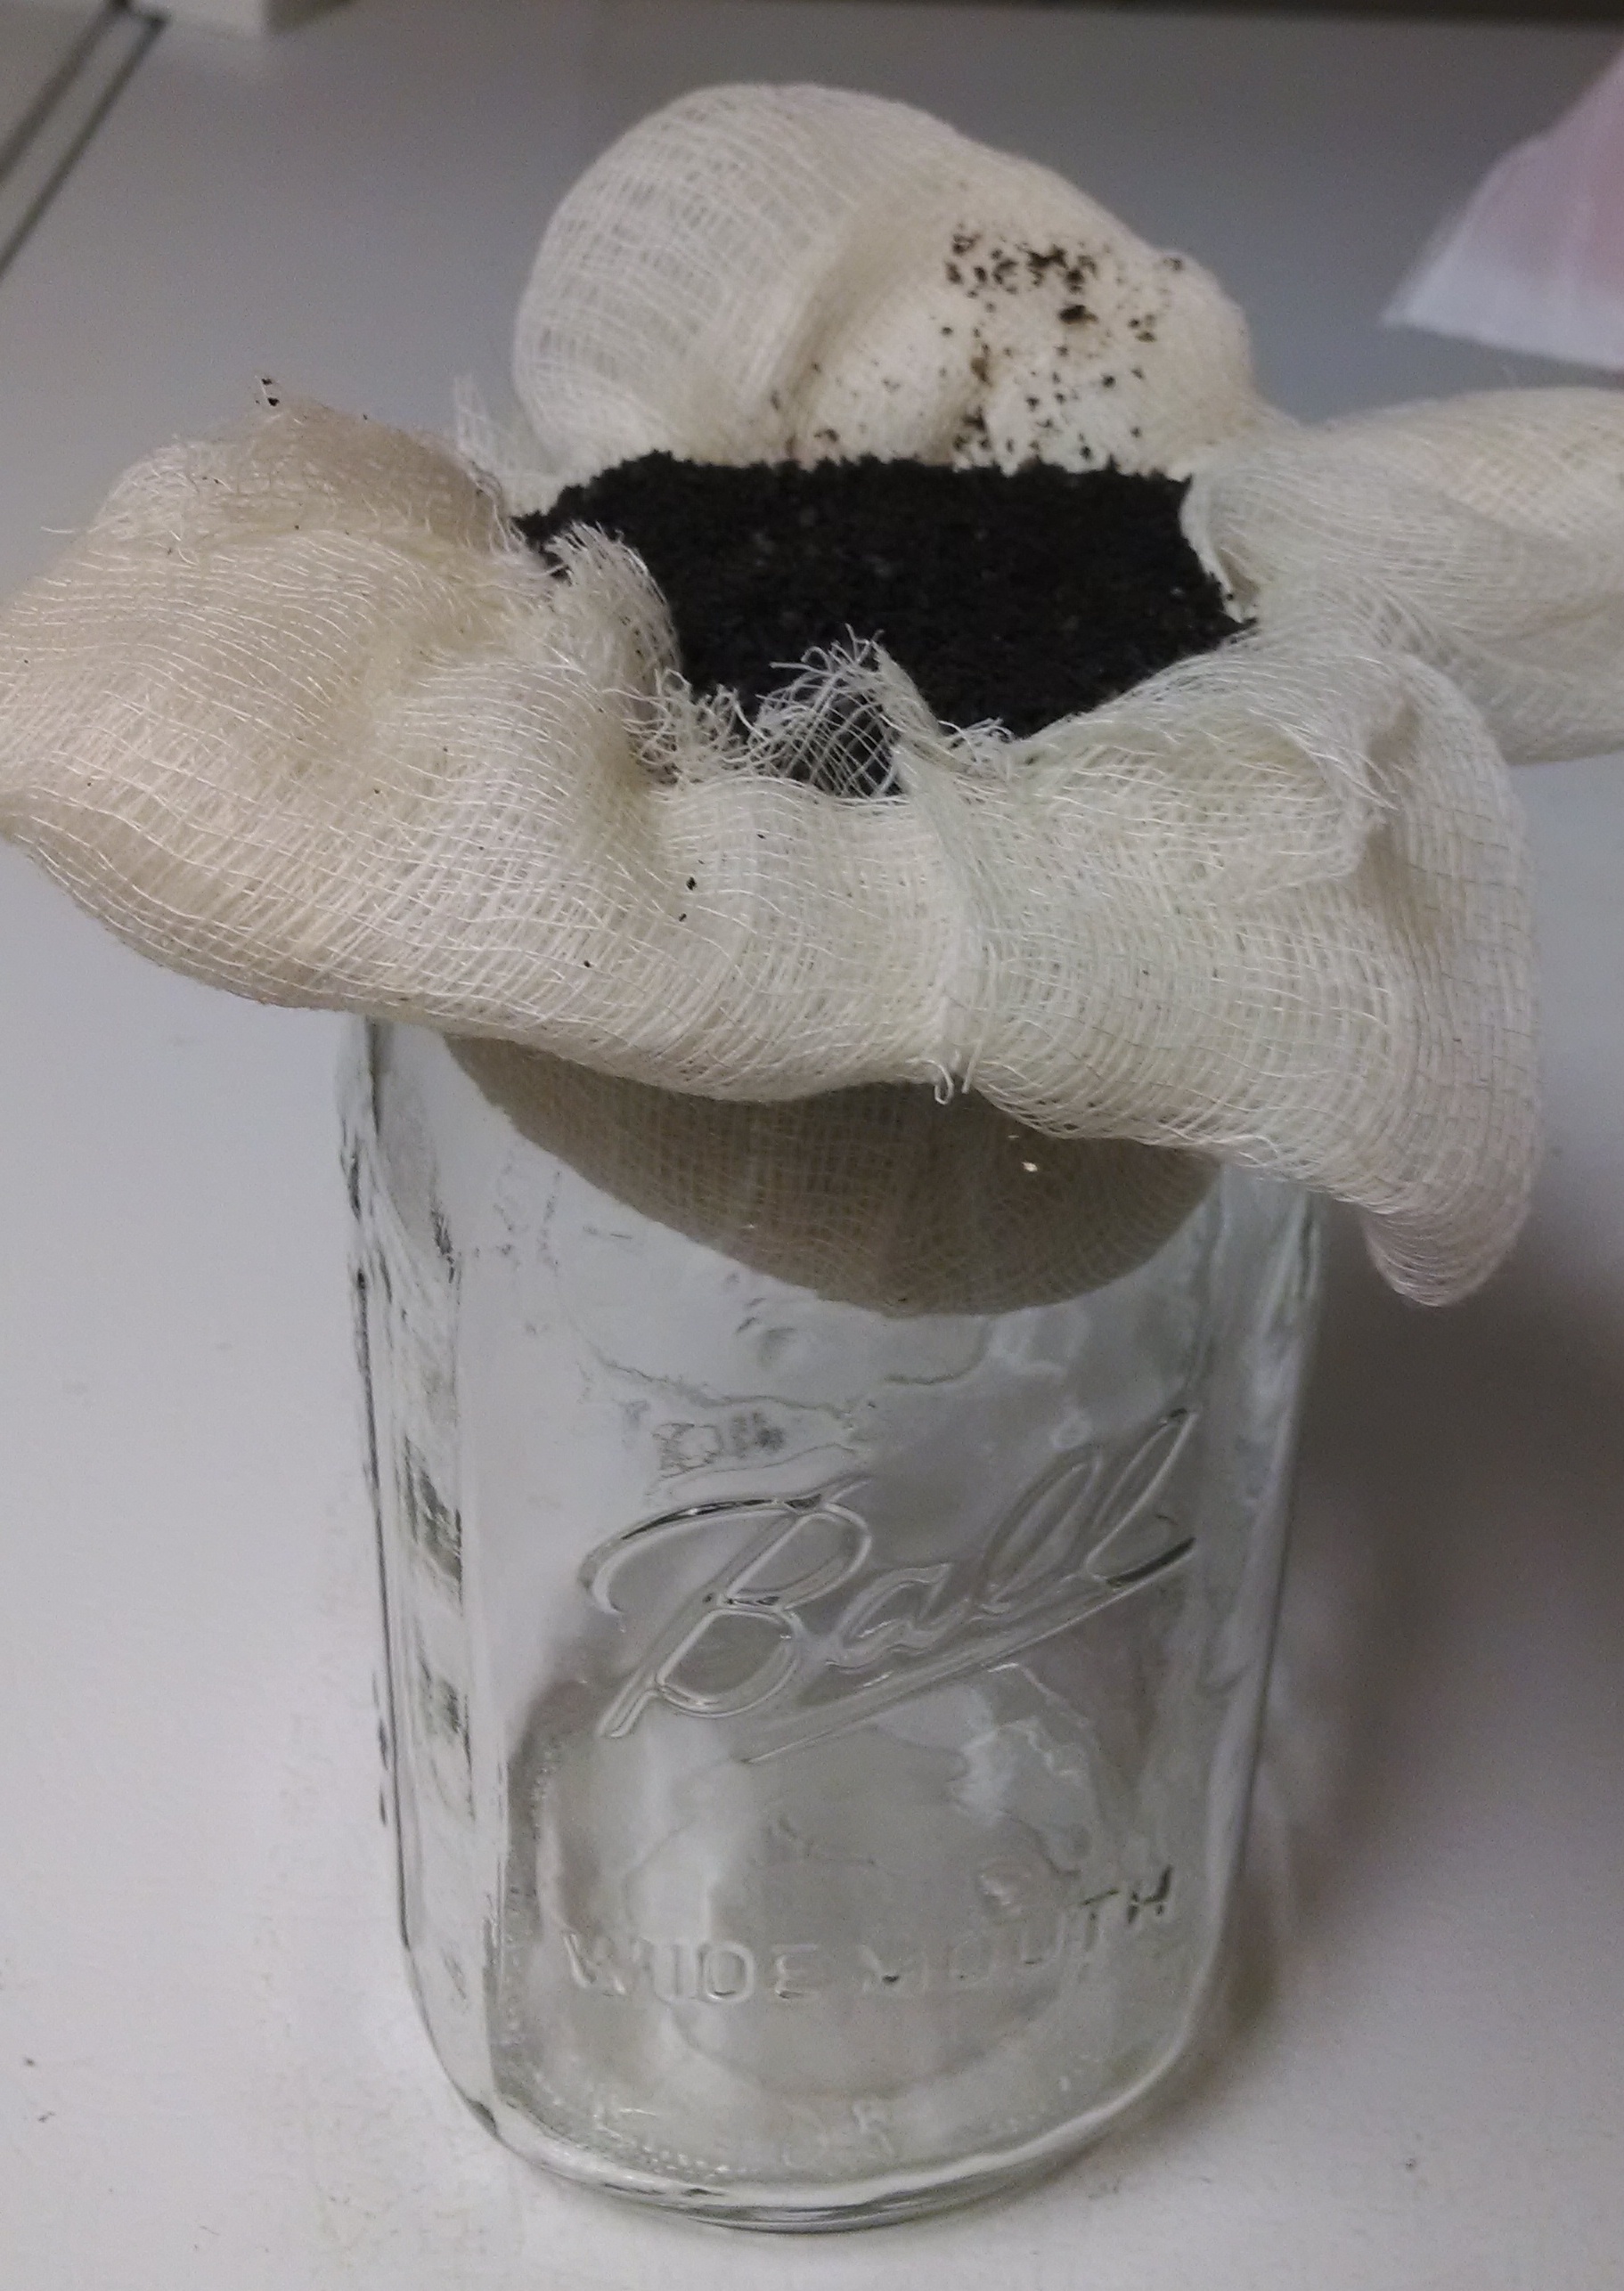
Fill that pocket with the coffee…
Step 5: Once filled, screw the lid tight, enclosing the edge of the cheesecloth securely. If some grounds fall into the water, don’t worry; You’re going to again filter the coffee through a paper filter to ensure you don’t drink any grounds.
Step 6: Let it sit 12-24 hours; Again – The longer you wait, the stronger the coffee.
Step 7: Remove the cheesecloth and wash out the grounds– You should be able to reuse it often. Filter the brew in the mason jar through a paper filter, add ice, and drink away!
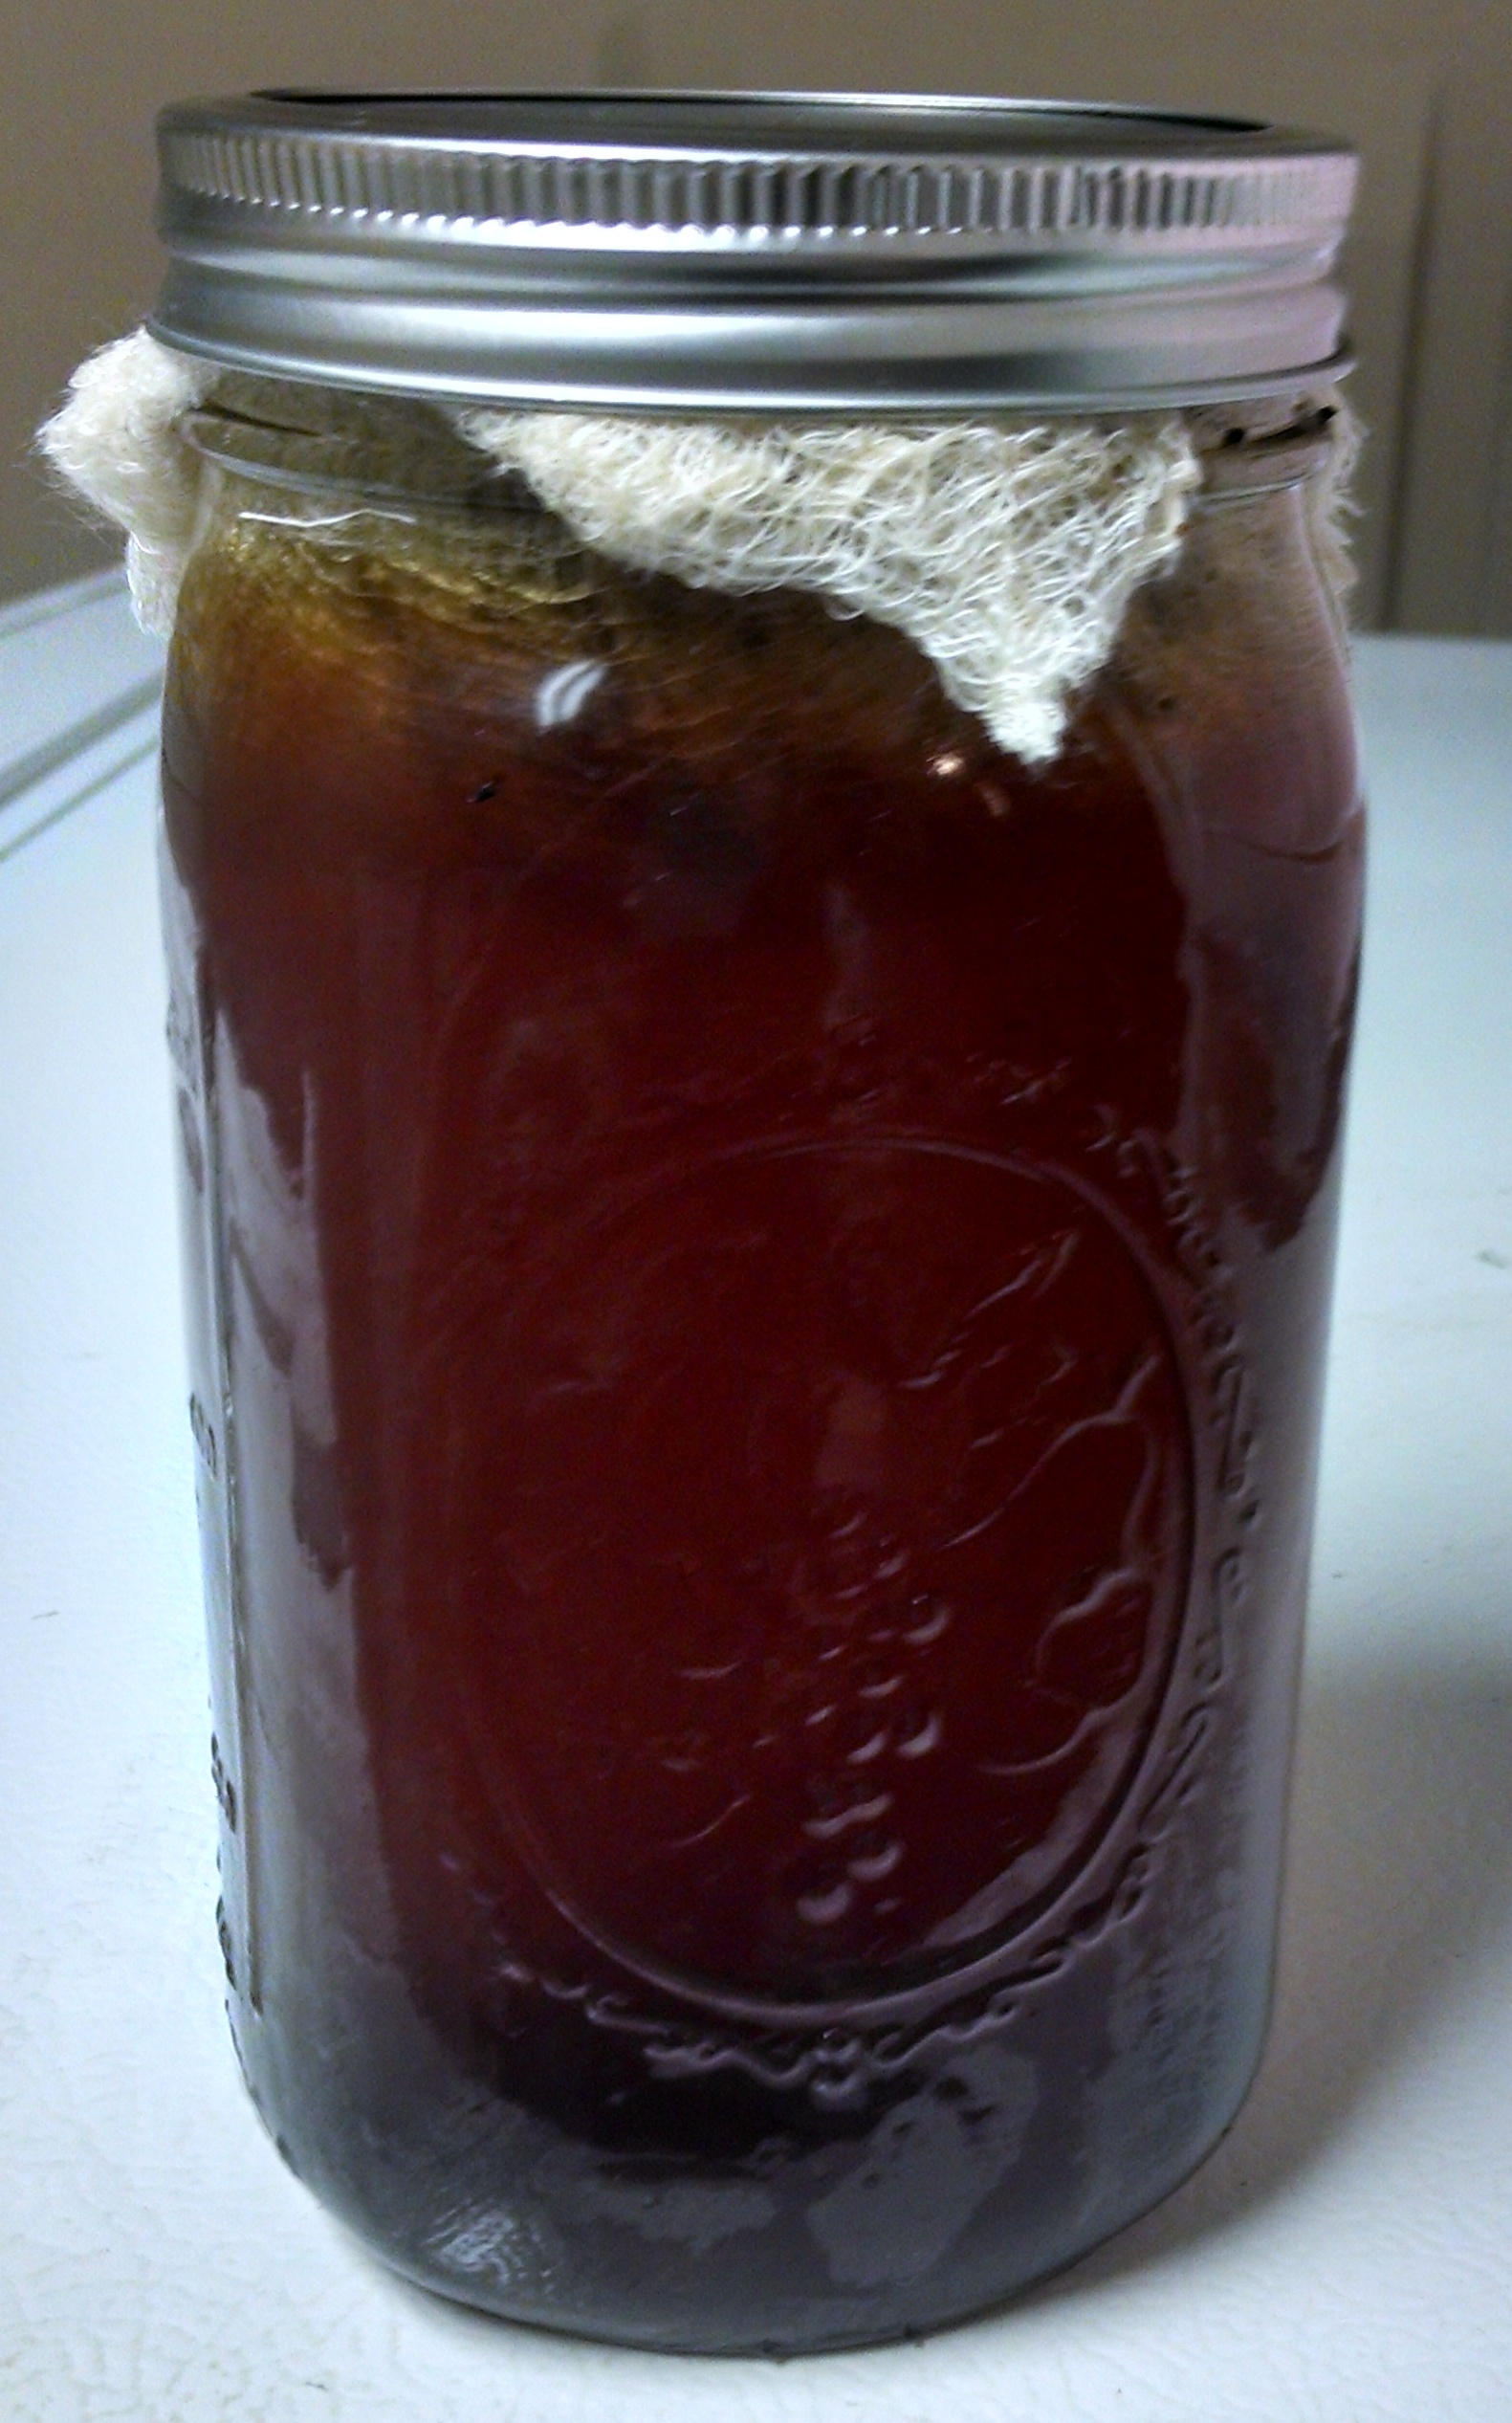
Twist the cap on and the water starts to darken immediately!
Time: First time – 20 minutes. We couldn’t decide how to do the cheesecloth. In the end, the best way is to fold it so that the cloth can hang over the edge, but there is a “pocket†in the middle as referenced above. Second time, 2-3 minutes.
Cost:Â Same cost as above, with the exception of the cheesecloth. This will run about $4 for 9 sq feet- And you’ll be able to reuse this self-made filter if you take care of it and wash it out carefully.
Quality Review: Great! The flavors really popped using this method– The coffee wasn’t able to settle in the bottom like it did in experiment 1. It was a very dark coffee, full of flavor. Poured over ice, it was a delicious way to start my day!
Thoughts and Recommendations!
I strongly recommend trying both methods– See what one ignites your tastebuds! Both these methods allowed me to focus on other things in the morning. I grab a mason jar from the fridge (made the night before) and run out the door with a paper filter in my pocket.
My favorite was absolutely the cheesecloth. I laughed at the idea at first — I have used sticky cheesecloths in the past to wipe down trim and walls before painting! Luckily, the thought of that wasn’t too tough to get past, but I didn’t realize the uses I could get from it!
Experimenting with numerous brewing methods has become more than a hobby- in a lot of ways its become a stress reliever and something that my passion lies within. What I love about coffee is there are hundreds of ways to make/brew coffee, and not one is necessarily “right†or “wrong.†Take a minute to think about that! Imagine what it would be like if you could go to work and do your job THE BEST WAY you thought possible, no matter how crazy or outside the box it seemed. Wouldn’t that be cool?? Maybe– Or maybe not… Have you seen the movie Office Space?? Imagine that same idea of “trying whatever you want†with coffee. If you want to try to brew beans in a guitar that you play for two hours and pour water into, you’re FREE TO TRY IT! That doesn’t mean it will be good– but you’ll get an “A†for effort. Coffee is very forgiving —  but there are three basic ways I evaluate my own coffee brewing experiments: Time, Cost, and Quality.
From the first two experiments, I asked myself these questions:
Did this meet my timeline? Yes! After it was done once, the time was only a few minutes. It saved me more time than that in the morning, not having to make my own coffee nor hit a drivethru.
What was the cost? I really only had to invest in a few mason jars (which will last me a long time) and for testing, we used a few different coffees. All of the coffees we used were medium to bold roasts and in each experiment we used each coffee ( essentially, making a LOT of coffee in the process). A bag of coffee isn’t expensive- Choosing a good bag is probably the key, but will cost you around $10 — All in all, you should be able to do this under $.50 cents a cup (Each mason jar will do about 2 “grande†type pours.)
Quality?? How was it? Our plan is to keep testing numerous coffees, but my favorite was a Sumatra blend — Every time we used it, it was flavorful. However, the flavor the cheesecloth brought out in it was the best. Experiment 1 was good, as mentioned above. Experiment 2, though?? Man – It’s my favorite. I’ve used it several times this week and plan to continue to use it for my day-to-day until I find an even better method.
I drank all my coffee black — Something that is growing on me, especially with iced coffee. However, if you drink your coffee with sugar, put sugar in it… If you drink it with cream, add some cream! While there are hundreds of ways to brew coffee, there are hundreds of ways to drink it- And you should enjoy it how you like! Have you ever tried these ideas? Do you have any that you think are better? Join me in trying both experiment one and experiment two – Let me know what you like best and what it is specifically you liked about it! I look forward to hearing from you!
If you made a weeks worth of The Cheesecloth Method and filtered them all right away, would the coffee be ok to store in the fridge until the end of the week?
Hey Jim!
Great question! Coffee brewed hot starts breaking down immediately if it stays at room tempature. Usually 5-6 hours before a noticable taste difference occurs with a hot brew. However, coffee will stay good up to a week if you brew it cold.
The most I’ve made in a week was 6 mason jars. I let them sit about 20-24 hours in the fridge with the grounds in the cheesecloth, then I filtered them, putting 5 back, drinking the 6th. The other five were great, even a little stronger with each day sitting in the fridge.
You’re good for up to a week. Let me know how you like it!